
Motorcycle Investor mag
Our bikes - Project 6-Hour - part 1
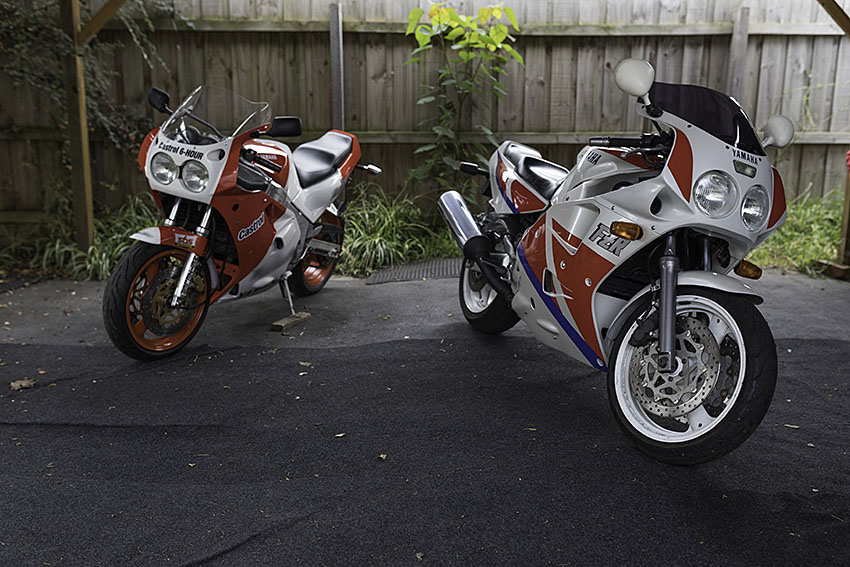
1987 Yamaha FZR1000 Castrol 6-Hour replica
(From Motorcycle Trader magazine #324, circa August 2017)
by Guy 'Guido' Allen, pics by Ben Galli
Little Surprises
You never quite know what you’re in for when you start stripping down a new purchase
If you’ve been following the mag, you might be aware I recently went on an unintended Yamaha FZR1000 buying spree, ending up with the first two models in the shed: a 1987 dressed up in Castrol 6 Hour production race warpaint, and a 1990 version, which is the first of the EXUP (exhaust power valve) machines.
The second bike is a runner and one day I might get around
to giving it a proper cosmetic tidy-up. Measnwhile the
first cost $2600, complete with new tyres, chain and
sprockets, and brake discs in complete and reasonably tidy
order. The catch? It has a leaking head gasket – or so I’m
told – and fork seals. Both are jobs I can probably tackle
myself, with a little patience.
With a couple of spare hours, plus photographer Ben Galli
on board, we decided to take a proper look at what we
have. Young Galli is fun to work with, as he sometimes
snatches the tools out of my paws and gets on with the
mechanical work, while I end up taking a few shots.
Anyway, where were we? Stripping the motorcycle. A couple
of tips for you: have a nice big table or bench on hand,
so you’ve got somewhere to lay out tools and components as
you go. Scratching around on the floor for missing bits
sucks. Second, get yourself one of those big storage bins
with a snap-on lid from the local hardware store and use
it to keep all the bits and pieces together as they come
away from the bike.

Stripping an FZR isn’t too challenging. Pull off the seat
and then disengage the sidecovers. They have those awful
tongue and grommet attachments, which often get fragile
over time, so it can pay to use a broad screwdriver to
carefully lever away anything that looks delicate.
Just as a distraction, we discover a toolkit under the
seat tail. An owner handbook would have been good too, but
I’m pretty excited about the toolkit. Is it original? Err,
judging by the weird mix of brands, including Nissan,
maybe not. Still it was a nice thought.
The tank is typical for the period – looks slim in profile
but has an enormous reserve sitting down out of sight in
the frame rails. A couple of bolts, plus a few hoses sees
it come away.
At this point you’re getting a good look at the frame and
it’s astonishing how different it is to the one on the
second-gen machine launched just two years later. You can
see the differences even with the bodywork on. They might
both be called Deltabox, but the 1989-90 version is far
more beefy with more complex profiles. It would be
fascinating to chat to the designers to find out why.
In any case the frame’s key element is the massive set of
twin aluminium spars which splay out to leave room for the
fuel tank, plus a substantial airbox and carburetors.
There’s a fair bit of plumbing under there – two big hoses
feeding cool air to behind the carburetors and under the
fuel tank and, under the airbox, pipes for the liquid
cooling.
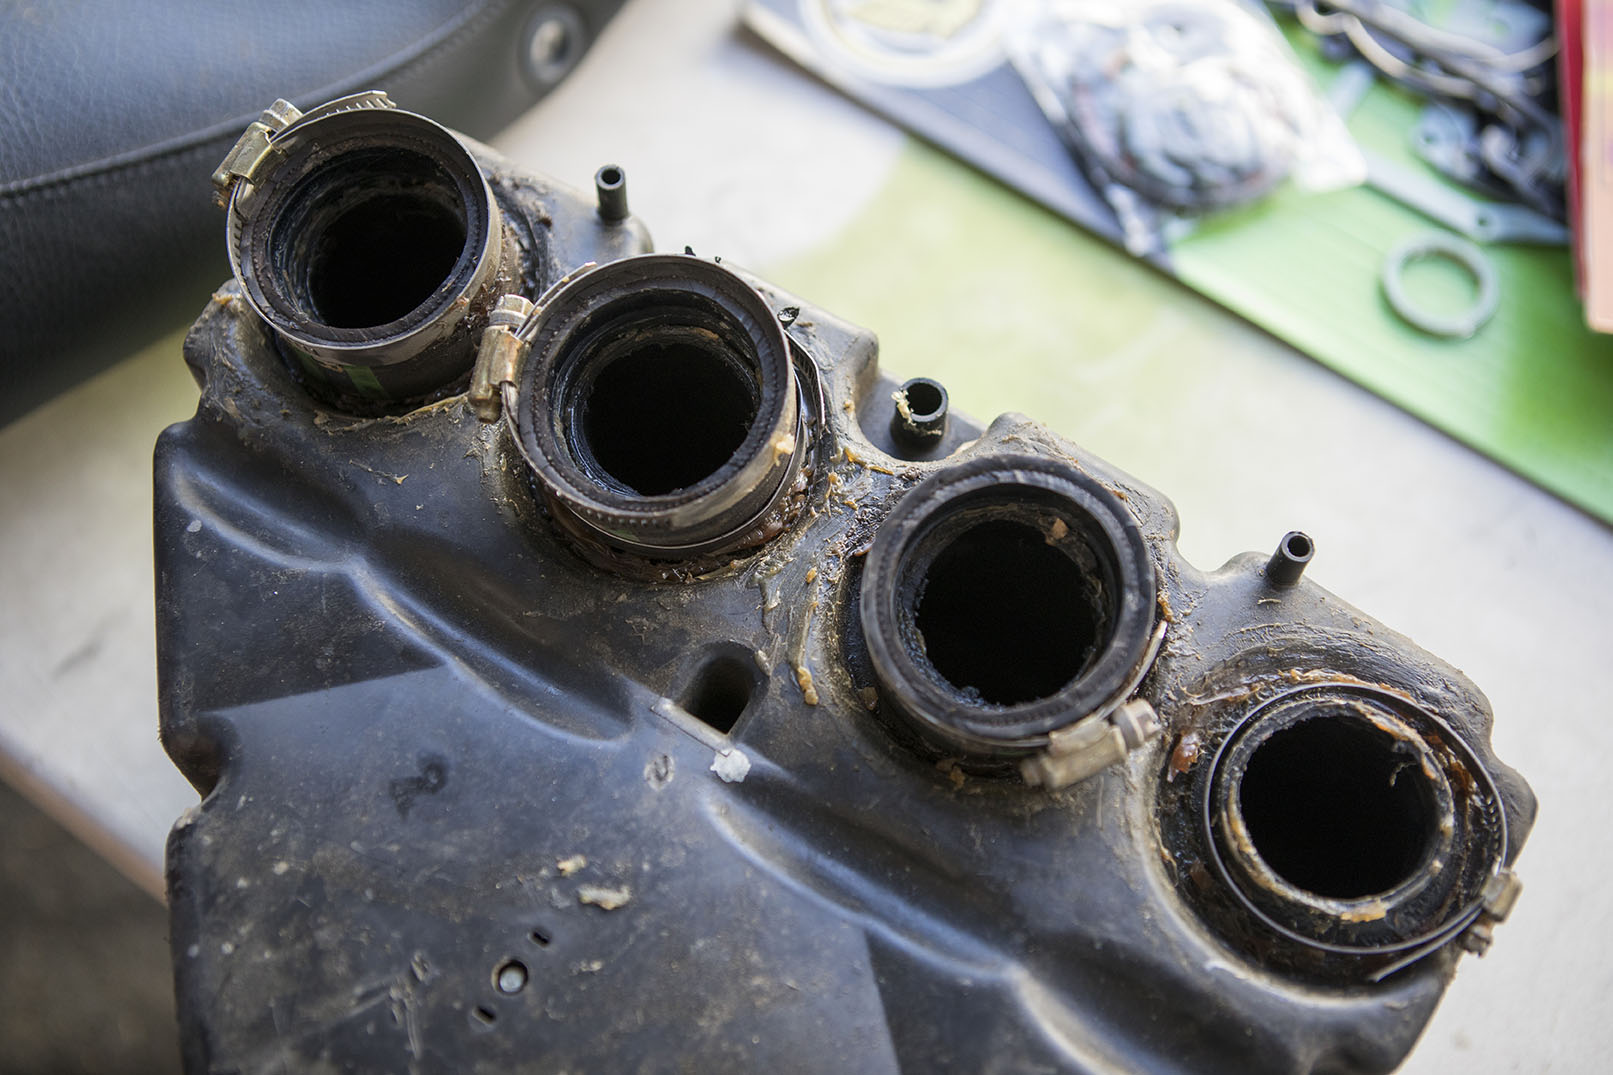
Removing the airbox is fiddly. Lots of hose clamps to undo, and this is where we start to uncover some surprises. Someone had decided the old inlet trumpets connecting the airbox to the carbs were no longer usable. This is common, as they can perish over time. So they’ve made up a set with bits of car radiator or heater hose sliced up to fit. Ingenious, if ugly. I grudgingly had to admire the thinking, but was appalled at the buckets of silicon sealant that had apparently been applied with a trowel.
Seriously, this is meant to be a high-performance motorcycle, not some jury-rigged bit of back yard plumbing.
The use of gobs of silicon is also bloody risky. There’s a
real chance it will be ingested by the carbs, blocking
jets. So I can now add at least partially disassembling
and cleaning the carburetors to the list of jobs. No
matter. It was something that would have been worth doing
anyway.
Righto, next pull away the carburetor bank. Weirdly the
biggest hassle is undoing the throttle cables, which seems
to require a black belt in contortionism. We get there,
release the clamps on the induction tubes and hey presto,
more silicone!
I can understand the original induction tubes (we’re now
looking for eight) might be pricey, but this is one area
of the machine you don’t mess with. Certainly not with a
bucket of your favourite all-purpose sealant and a trowel.
It will never work 100 per cent and will inevitably rob
you of performance.
It’s at this point we decide to pull off one of the
fairing side panels to get a gander at what we’re up for
at the next stage. Why only one? Because I know we’re only
going part way and I don’t want any more loose parts
floating about than absolutely necessary.
This gives us a good look at the next steps. The radiator,
oil cooler and of course the exhausts are coming off. At
this point we can also see the frame downtubes are bolt-in
items and it looks as though one of the options is to
pivot the engine down, from the rear mount, for better
access to the head.
Since I haven’t pulled one of these apart before, I’m thinking a workshop manual would be a really handy thing. That’s next on the shopping list. Then we’ll be hunting down some new inlet rubbers. I have a feeling a new set of rings and light hone might be worthwhile once we get the head off, and who knows what shape the valves are in?
So far I’ve spent $230 on a gasket set that looks like it
covers most eventualities, plus another $30 on a set of
fork seals. Oh, and $15 for a parts bin! Assuming I can do
most of it, it will be interesting to see what the whole
job ends up costing.
I’ve also managed to get my hands on a new bike hoist –
the previous one spat its seals and turned out to be a
little small – so that will be handy once we get further
into the nuts and bolts.
Wish me luck…
****
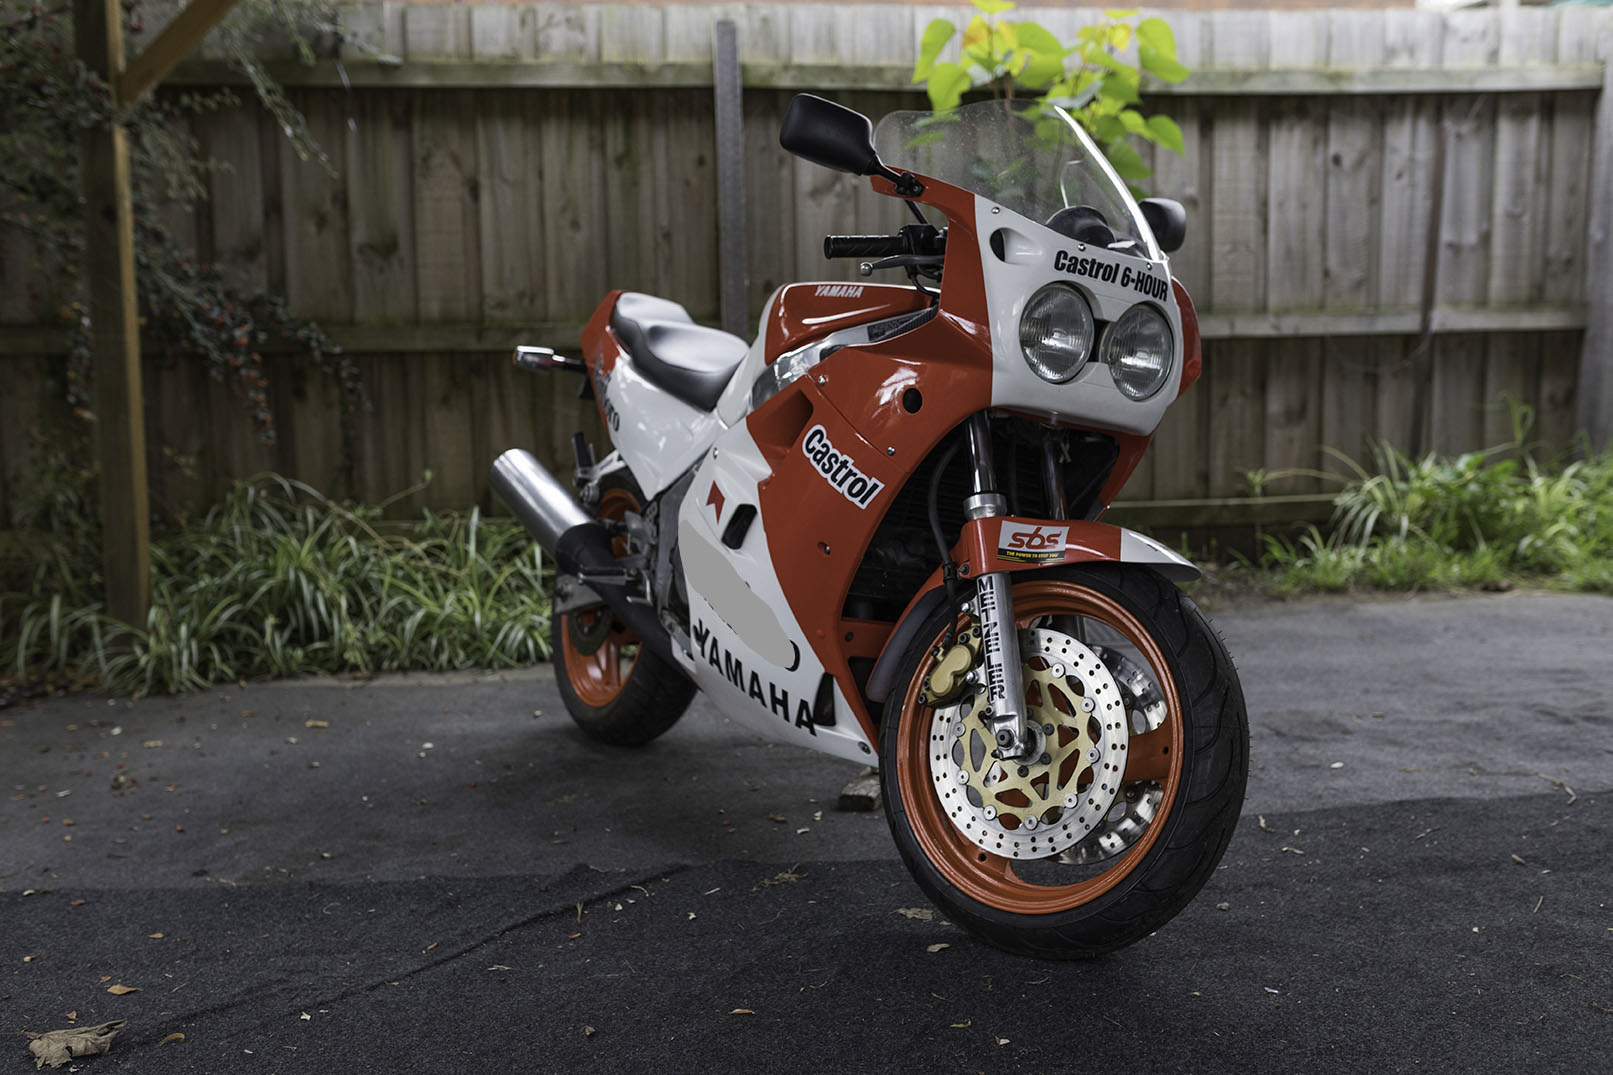
The 6-Hour bike
This is the model that won the last ever Castrol 6-Hour
production race, in 1987. Kevin Magee and Michael Dowson
were the riders and they beat the next team, also
FZR-mounted, by three laps.
The bikes in this event were meant to be production
machines, right down to running street-legal tyres, though
there was sometimes controversy over things such as late
factory technical bulletins homologating new parts.
Over its run from 1970, the 6-Hour established itself as a
hugely influential marketing tool for the competing
motorcycle and tyre manufacturers, not to forget Castrol
as the main sponsor.
The bike was wearing the period tobacco company main
sponsorship logos – reflecting a commercial arrangement
that would be illegal today. I've reluctantly decided to
remove the branding, though it would be historically
accurate, as the consequences of running with it are too
aggravating to deal with.
However the colour scheme remains.
Project 6-Hour story series:
Part 1 – strip
Part 2 – that looks nasty
Part 3 – engine running
Part 4 –
finished!
-------------------------------------------------
Produced by AllMoto 61 400 694 722
Privacy: we do not collect cookies or any other data.


Archives
Contact